Monitor Windows Machines with Windows Management Instrumentation (WMI)
Introduction to WMI
WMI is a set of specifications included in Microsoft Windows which provides NEMS Linux with information about the status of Windows-based hosts.
Disabled by default, WMI requires some configuration before NEMS Linux can monitor the Windows host.
Windows Versions Tested and Verified to Work With NEMS 1.6 and WMI (3/17/2023)
Windows 10 Pro Version 22H2
Windows 11 Pro Version 22H2
Windows Server 2016 Version 1607
Windows Server 2019 Version 1809
Windows Server 2022 Version 21H2
Setting up WMI
Configure WMI on the Windows end
In order for the agent to have access to query WMI to collect and database metrics, the agent must have permission to access both DCOM and WMI.
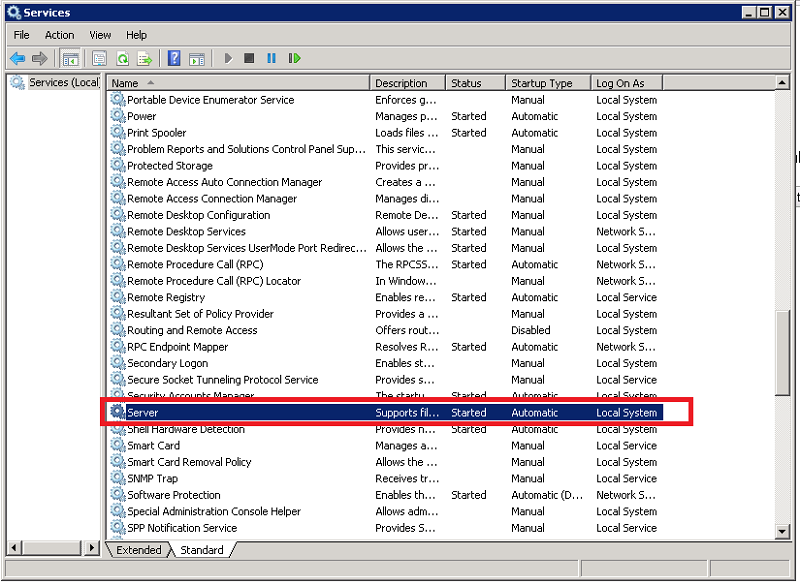
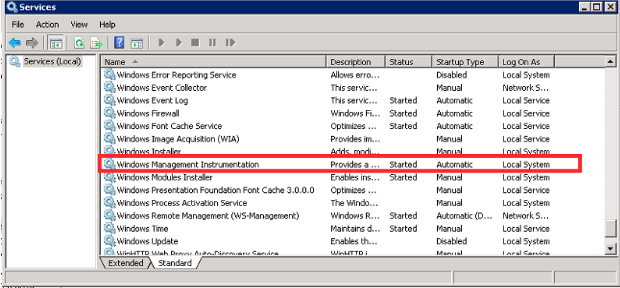
Verify that the Remote Registry, Server, and the Windows Management Instrumentation services are running.
Click Start.
Click Run.
Type services.msc and press “Enter”. This will open the Services dialogue.
Scroll down to the Remote Registry service. Verify that the service is started and is set to Automatic.
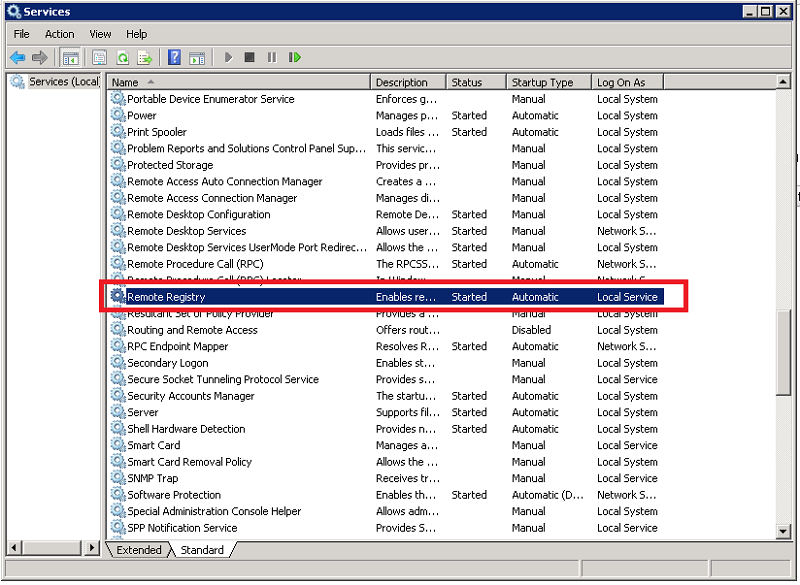
By default even if the Remote Registry service is started Windows 7 and later systems will deny remote access to the registry.
Scroll down to the Server service. Verify that the service is started and set to Automatic.
Scroll down to the Windows Management Instrumentation service. Verify that it too is started and set to Automatic.
Note
The best practice is to use a Local account on the monitored host as the agent user.
Where this is not possible, use these procedures to grant permissions for a remote user.
All windows workstations must have a user with the same local user name and password.
Local user account on the target computer must have explicit DCOM and WMI namespace access rights granted specifically for remote connections.
User must also be a member of the Performance Log Users group
Local security policies must be enabled for Classic - local users authenticate as themselves
Grant minimal WMI permissions to the remote user
This limits users other than those configured from remotely accessing WMI.
Note
In the following example, replace “remoteuser” with the username of the user created on your Windows hosts.
On the monitored host machine
Right-click on This PC
Click Manage
Navigate to Services and Applications → WMI Control
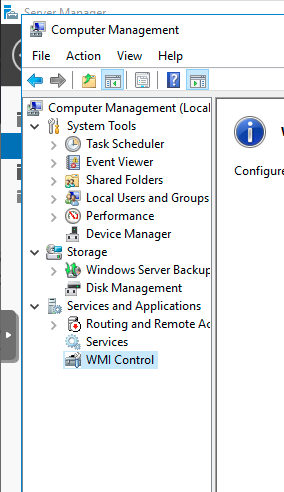
Right-click WMI Control and click Properties
In the WMI Control Properties dialog box, click the Security tab.
Expand the Root node and select CIMV2, then click Security

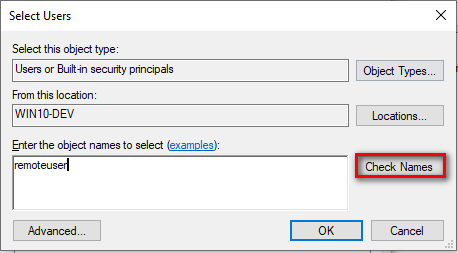
Select the user in the Group or user names box. If not listed select Add.

Type in the user name and click Check Names
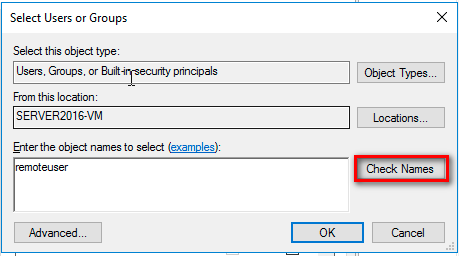
Click OK
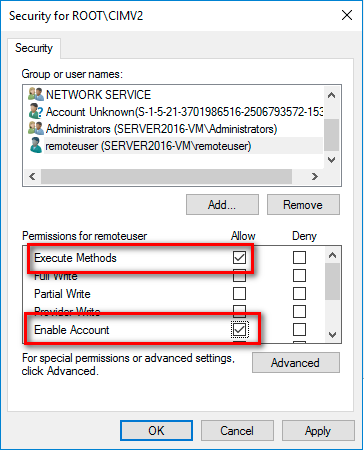
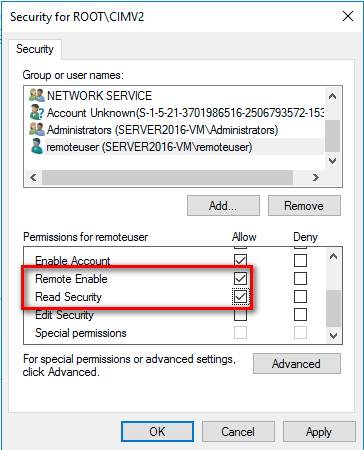
Grant the required permissions to the remote user by enabling the following check boxes in the Allow column:
Execute Methods
Enable Account
Remote Enable
Read Security
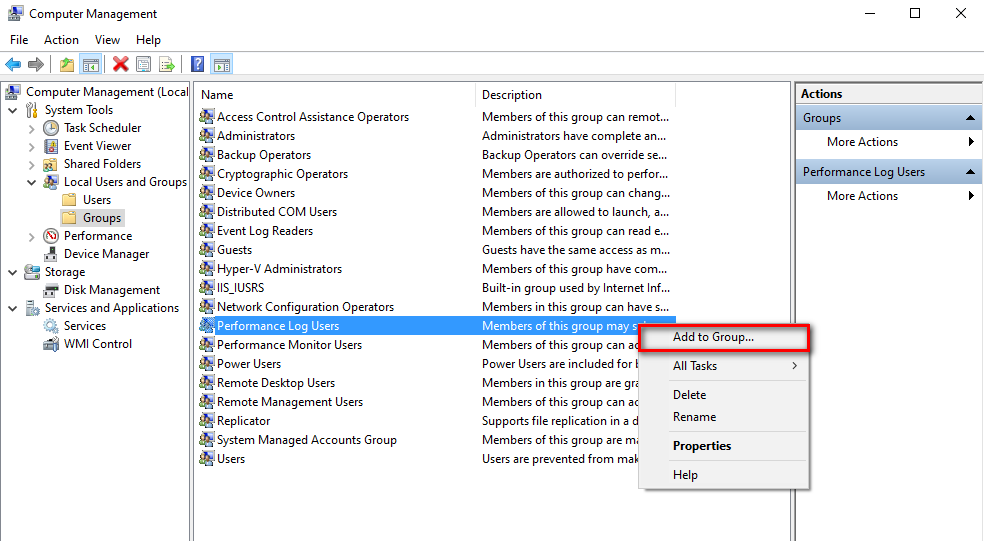
While still in Computer Management
Expand System Tools
Expand Local Users and Groups
Click Groups
Right click Performance Log Users
Click Add to Group
Click Add

Type in the username and click Check Names
Click OK
Click Apply
Click OK to close dialog box
Close Computer Management window
To grant DCOM permissions to a remote user
On the monitored host machine, at the Windows Run prompt, type DCOMCNFG and press Enter.
In the Component Services dialog box that opens, navigate to Component Services → Computers → My Computer.
Right-click My Computer and click Properties.
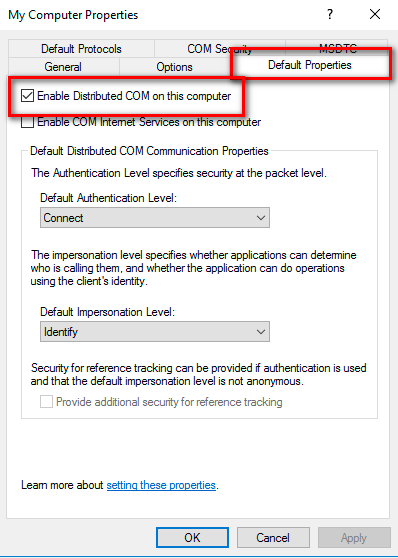
Select the Default Properties tab.
To enable DCOM, select the Enable Distributed COM on this computer checkbox.
Click Apply.
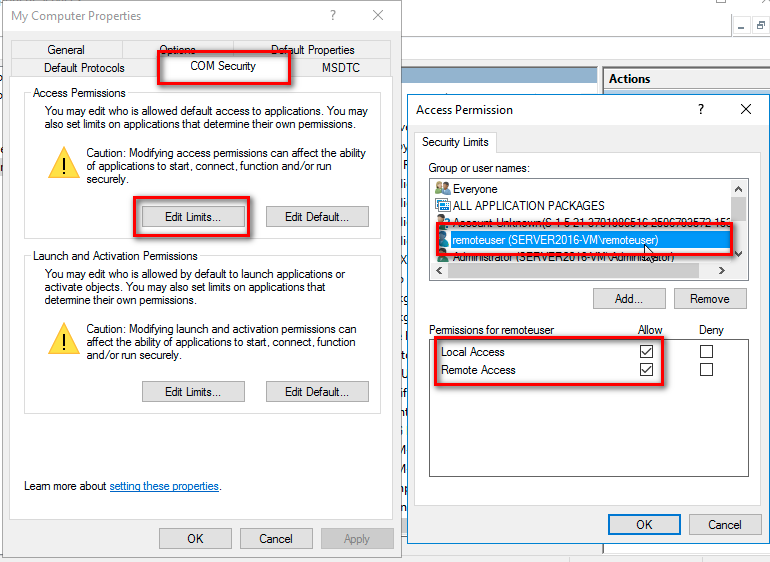
In the My Computer Properties dialog box, click the COM Security tab.
Under Access Permissions, click Edit Limits.
In the Access Permission dialog box, add the user or group name necessary for the remote user.
Ensure Local Access and Remote Access are checked and click OK
In the Launch and Activation Permissions area, click Edit Limits.
In the Launch and Activation Permission dialog box, add the user or group name necessary for the remote user.
Grant the remote user all the permissions available in the Permissions for Administrators area by enabling all of the check boxes in the Allow column.
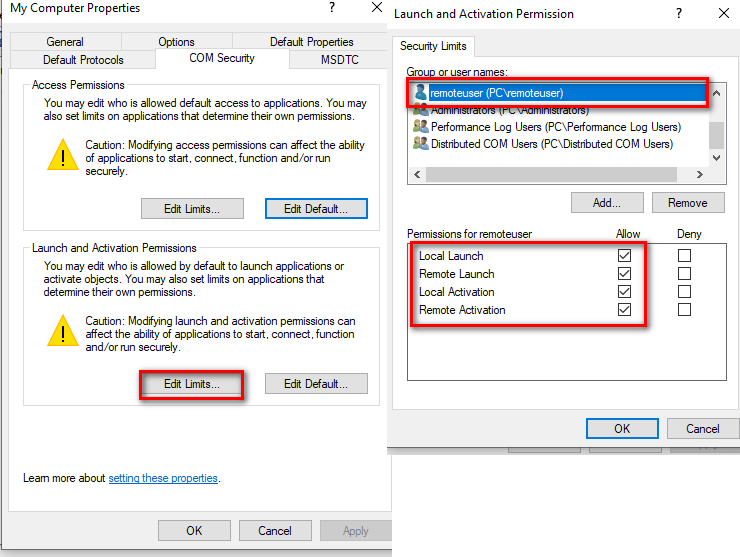
Click OK and/or Yes to close the dialog boxes.
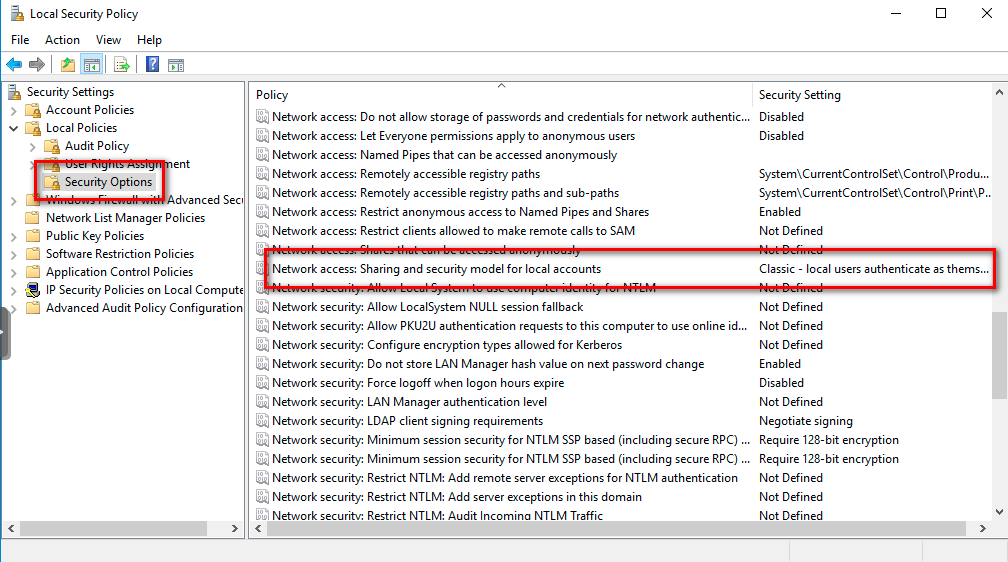
Enable Classic Security policies for Windows Systems that are not part of a domain.
Open the Control panel, and go to Administrative Tools → Local Security Policy.
The Local Security Settings window appears.
Go to Local Policies → Security Options.
Change the value of Network access: Sharing and security model for local accounts. to Classic.
Open the Windows firewall for WMI traffic
Enter the following in an Administrator Command Prompt:
netsh advfirewall firewall set rule group=”windows management
instrumentation (wmi)” new enable=yes
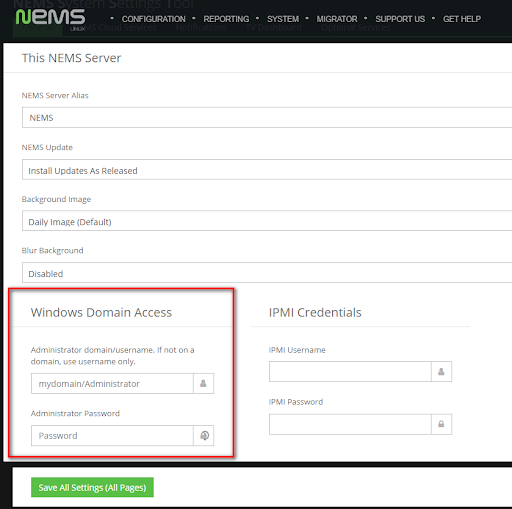
Add Your Windows User to NEMS SST
Enter the username and password of the user created on the Windows devices who was granted access to the WMI data.
Basic Configuration of Windows Devices In NEMS Linux Using WMI Check Commands
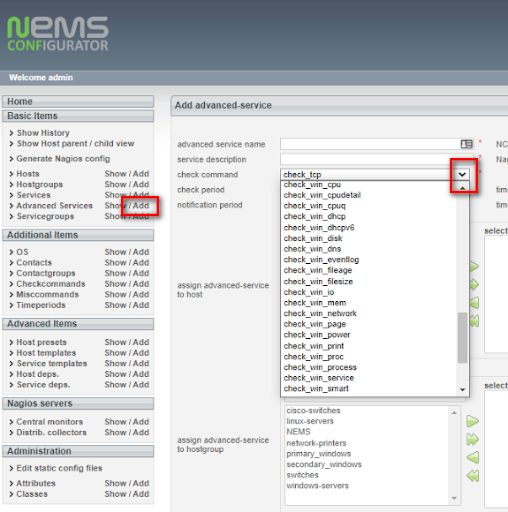
Adding check_win_xxxx Commands in Advanced Services
1. In NEMS NConf click the Add button next to Advanced Services. Then click the drop-down arrow in the check command select list, and scroll down to the check_win_xxx commands to choose the command you wish to add.
2. Configure the required fields and be sure to assign the Advanced Service to your Windows host. Then click Submit. You will see your new command in the list of available Advanced Services.
Repeat Steps 1 and 2 above as needed to add any further check_win_xxx services you require.
When complete these commands will now be available in the Advanced Services list.
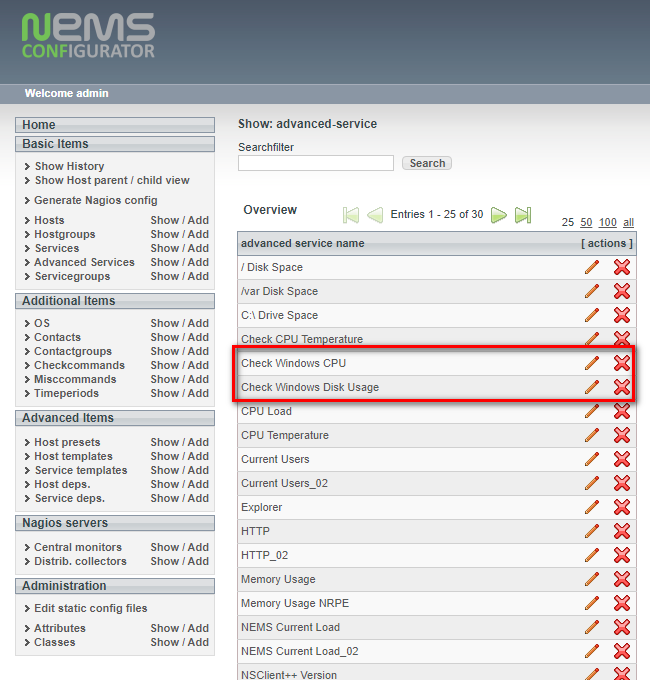
Configure these Advanced Services as required to meet your needs and assign them to one or multiple Windows devices.
Special Thanks to Bill Marshall
This documentation would not be possible were it not for the effort of Bill, also known as UltimateBugHunter-NitPicker on our Discord server. Bill setup a test environment, tested, documented, and screen captured the entire setup process and submitted it for inclusion in the official docs. Thanks Bill!