Check Commands: check_synology
Synology NAS monitoring is included in NEMS Linux 1.6 or later.
Description
This check uses SNMP to check the state of a Synology NAS.
You will see any problems displayed on your NEMS Tactical Overview, NEMS Mobile UI, NEMS TV Dashboard, NEMS Adagios, or whichever tool you prefer for monitoring your network state with NEMS Linux. You’ll receive an email, SMS, Telegram, Webhook or other notification (whichever you have configured on your NEMS Server) if a drive fails. Your NEMS Warning Light will even turn red if there is a problem with your Synology NAS.
Assigning your Synology NAS host to the Synology Host Group in NEMS Configurator adds the following sample Advanced Services:
Synology Disks
Synology Fans
Synology Power
Synology RAID
Synology System
Synology UPS
Synology Version
By default, the admins contact group will be notified.
The sample Advanced Services provided in NEMS Linux assume the community name to use is public.
Basic Usage
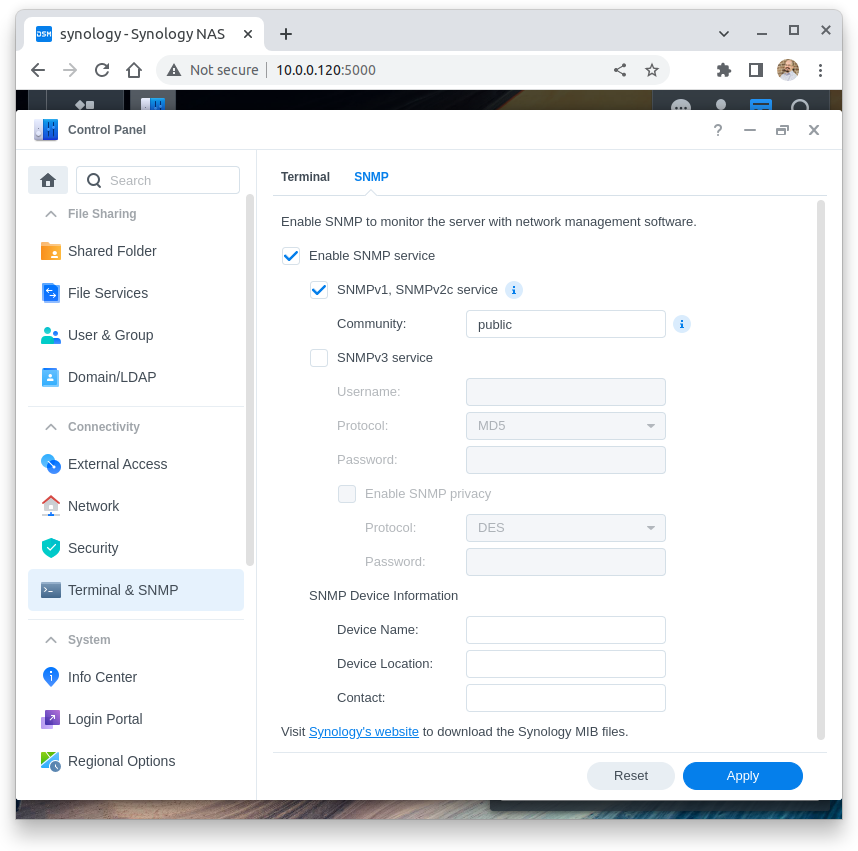
In Synology DSM
Visit Control Panel -> Terminal & SNMP -> SNMP
Check Enable SNMP Service
Check SNMPv1, SNMPv2c service
Ensure your Community name is set to public
You do not need to enable SNMPv3 service nor SNMP Privacy since we are using the public community.
Press Apply
In NEMS Configurator
On the left menu, click Add next to Hosts
Enter a friendly
hostnamefor you to recognize the device. Synology or Synology NAS are good examples.Under
Addressenter the local IP address of your Synology device.Leave
OSset to Linux.Set
monitored byto Default NagiosSet
max check attemptsto a reasonable number of attempts, such as 10.Set
assign host to hostgroupto Synology (Highlight it and press the single green arrow to add it to the right column).Click submit.
This next step is currently required the first time you setup your Synology NAS. In a future release of NEMS Linux, we will include new defaults to remove this requirement, but for now, you must set your defaults:
Click Show next to Advanced Services.
Click the edit pencil icon next to Synology Disks.
Set
max check attemptsto a reasonable number of attempts, such as 10.Press Submit.
Repeat these steps for each of the Synology Advanced Services until all have a default max check attempts
At this point, you may click Generate NEMS Config to activate your new Synology checks.
Reporting
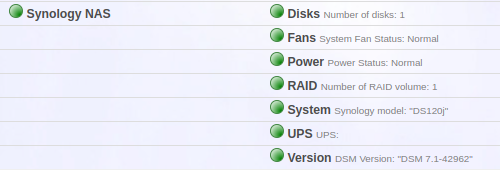
NEMS Adagios displaying an overview of all Synology Advanced Services in the OK state.
Congratulations! NEMS Linux is now proactively monitoring your Synology NAS device.
Compatibility
Tested with the following versions of Synology DiskStation Manager:
DSM 6.2.2-24922 Update 4
DSM 7.0-41890
DSM 7.1.1-42962 Update 4
This isn’t to say you must run one of these versions. Rather, these are simply the versions we have tested with successfully. It can be assumed that the Synology checks built-in to NEMS Linux will also work with other point releases of DSM.
Source
check_synology uses check_snmp_synology.